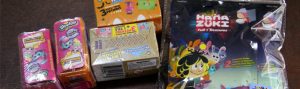
National Bookstore is usually a hit and miss with craft supplies. Sometimes you go in and get lucky. Last time I was there, I picked up this nicely packaged DIY Cat Keychain kit by a brand called Top Unique Collection. A little googling got me some stores online selling their craft related goods but no official site.
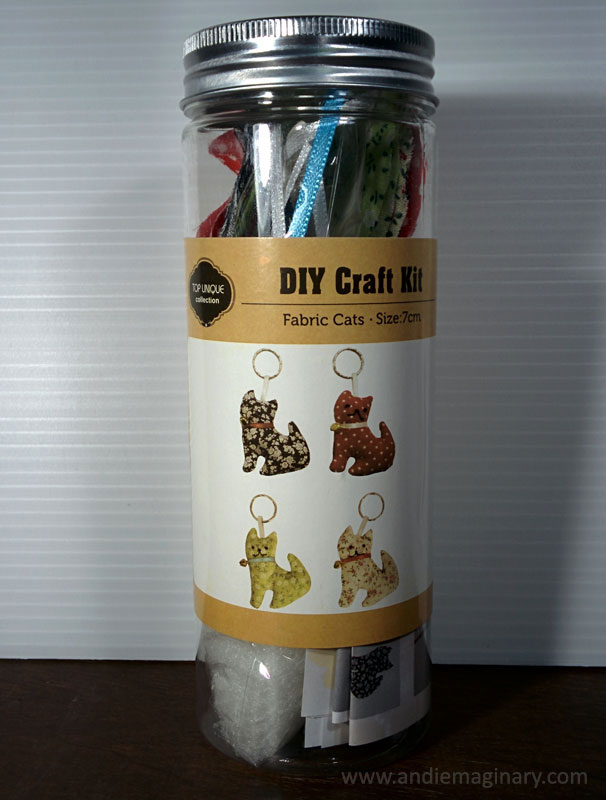
The bottle is pretty cute and I honestly think I can reuse it for something. It is around 7 inches high with the cap on. Diameter of 2 inches. This DIY Cat Keychain kit usually goes got about 95php but at the counter it was punched at 47.50php.
DIY Cat Keychain Kit Materials
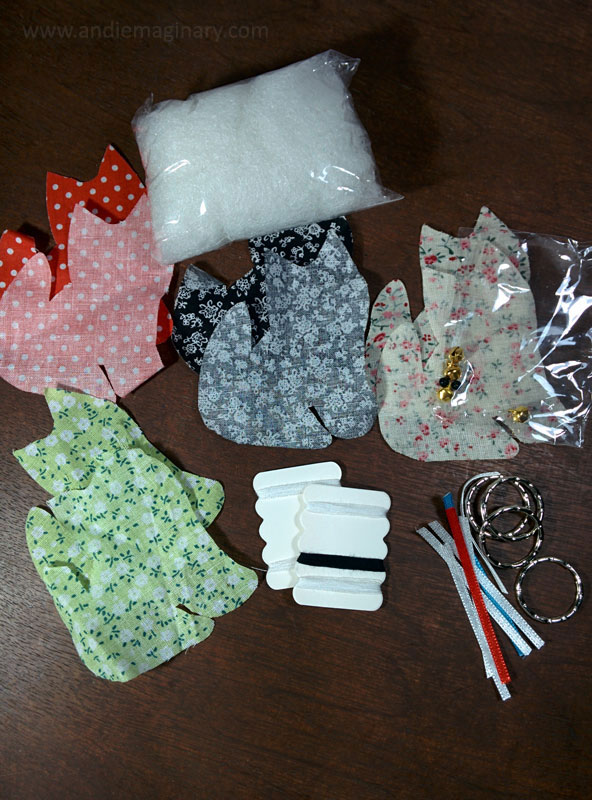
The kit comes with:
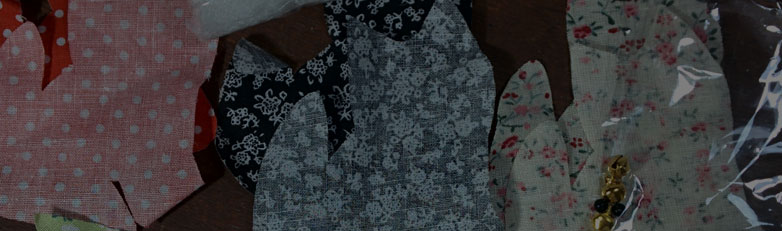
- 4 pairs of pre-cut cloth (I suggest you either keep one or trace one of them so you can make more)
- Black and white thread
- 4 keychain rings
- 4 small bells
- 1 pair of black beads (oh no)
- 8 small ribbons (Very plastic type of ribbons)
- Fiber fill (I am pretty sure the filling is some sort of polyester)
- How-to guide with only images (It is also missing a step or two)
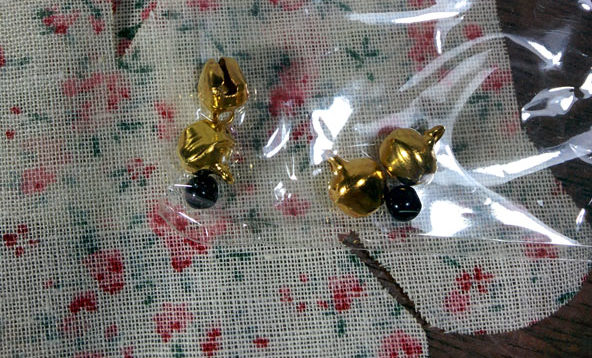
This was a little annoying. The kit only has enough black beads for one cat. So you can only make one cat from the whole thing. I thought maybe there was a mistake with the packing but I did buy 2 of these. Both kits only had ONE set of black beads to use as eyes.
You will need your own needle, scissors, and glue\hot glue.
This is the DIY Cat Keychain kit’s guide. It is rather small and I did realize it missed a step or two. This is the guide that came with the kit. (Click to enlarge.)
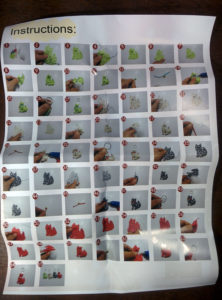
It does it for all 4 but if you look at steps 6 to 9, it does not show how you put on the white ribbon to put in the keychain ring.
Making the Cat Keychain
So I mostly followed the instructions but I did have a little confusion with those steps missing that I pointed out earlier.
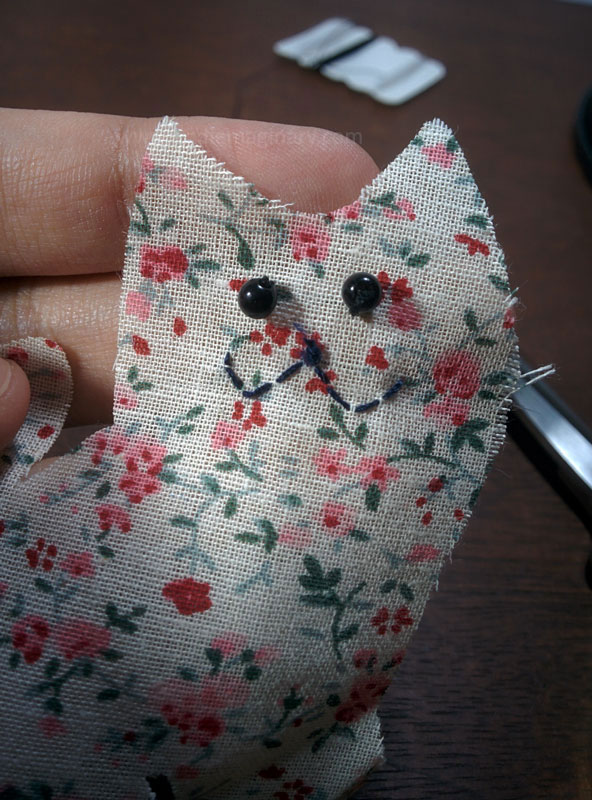
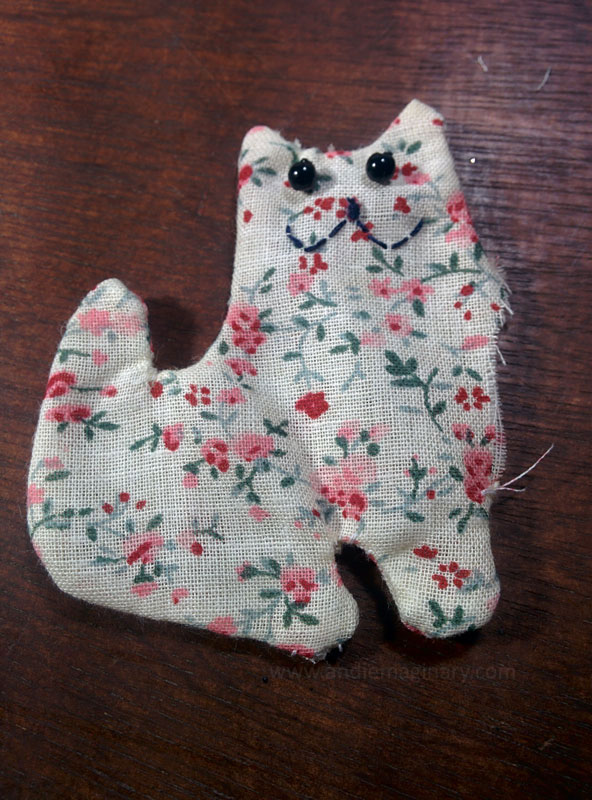
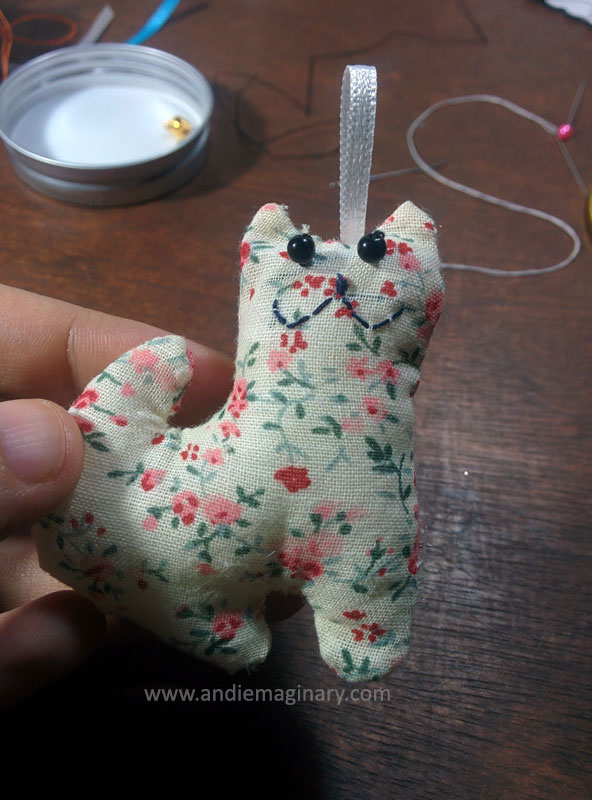
- Sew the face on. I used the knot as the nose. You can also draw on it with a pencil, or chalk before sewing so you have something to follow. Look at that smiling kitty!
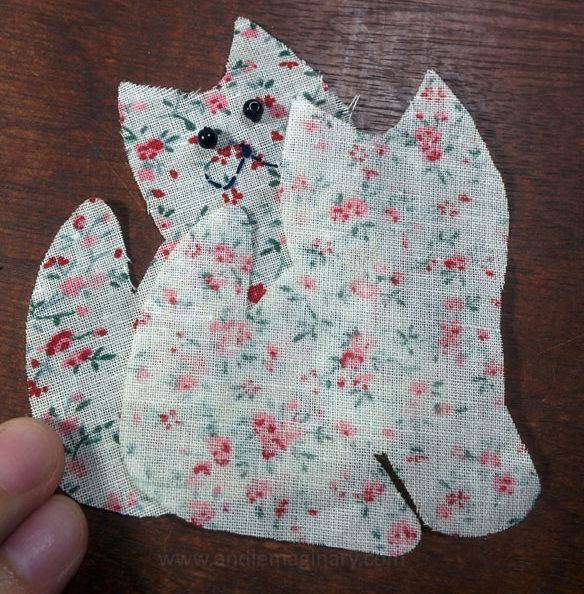
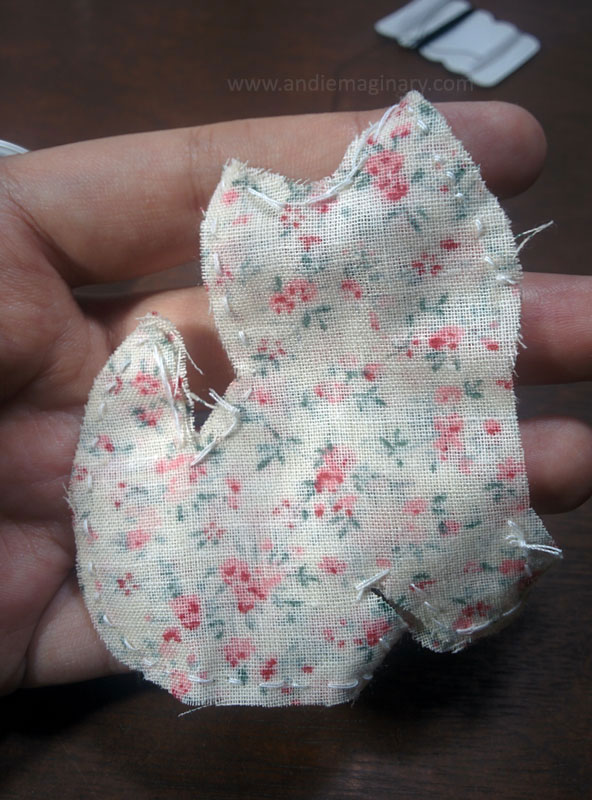
- Here are both sides of the of the cloth. Lay them on top of each other making sure that the front side of the cloth are facing each other.
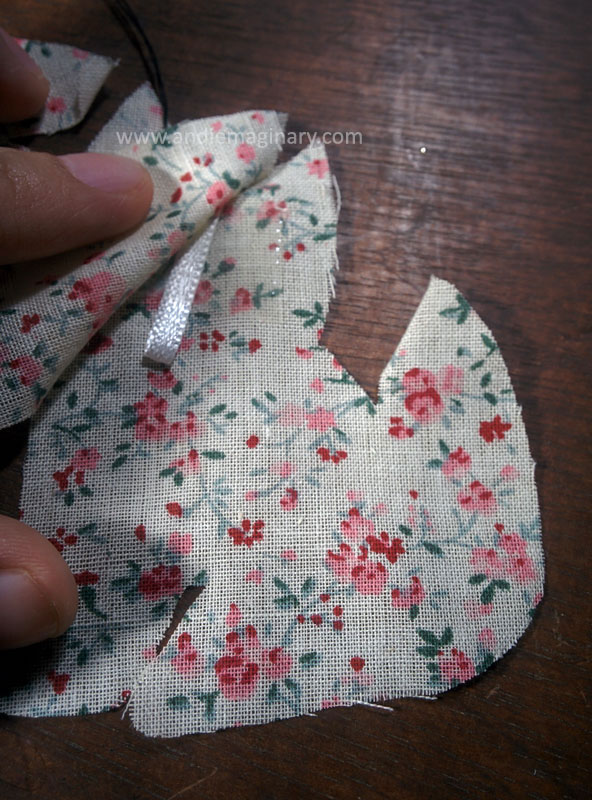
- Now this is the step not shown in the guide. To make sure you have the top white ribbon in, you have to sandwich the folded ribbon between the two pieces of cloth. I taped the ribbon on the piece without the face.
- Now you can sew it together. You can also draw where you want to sew beforehand if you like. Remember to keep a part open for the filling.
- Now you need to turn it inside out. You might need to use something small to help with corners. It will come out like this:
- Now to put in the filling. This piece came off so I took that amount and carefully stuffed smaller pieces in first.
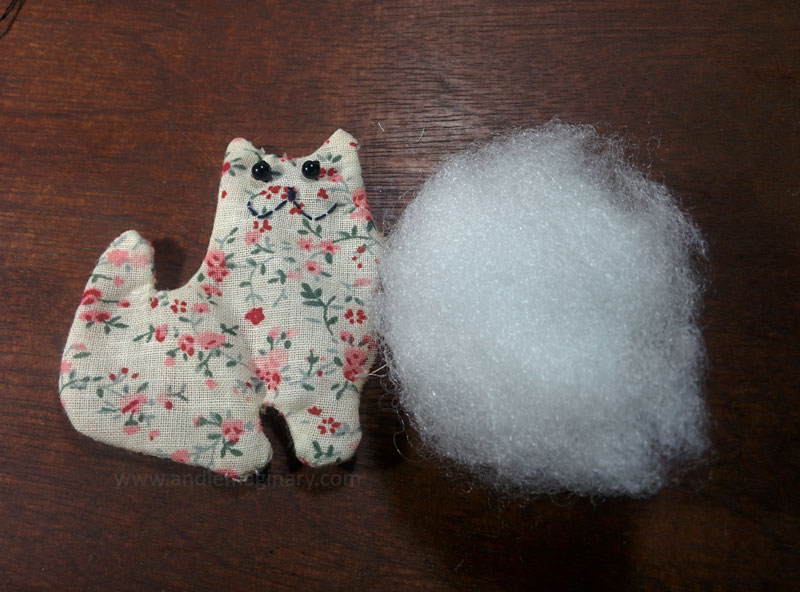
It will end up looking like this:
- Now you will need to sew the hole you left. Going to need to make a invisible stitch or a slip stitch. I had to google the name because my mom just showed me how to do it. To see how this stitch is made, you can check this video of how to do a slip stitch. Also don’t forget to remove the tape on the white ribbon.
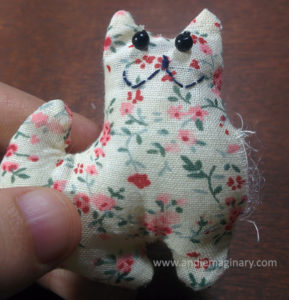
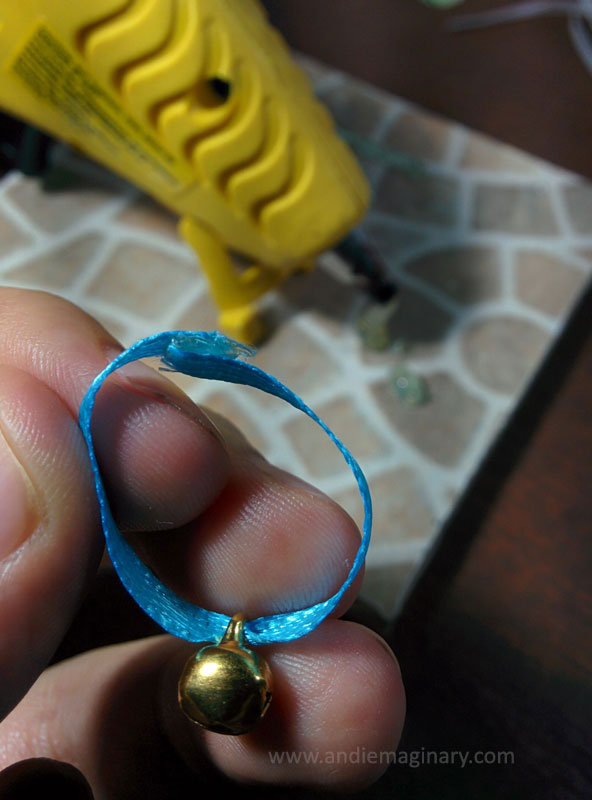
- Now you are done with the body, time to put the collar together. Thread the ribbon through the hole on the bell. I didn’t want the glue to get to the cat’s body so I glued the ends of the ribbon before putting it on the cat.
End Product
Put the collar on the cat and the keychain ring through the ribbon and voilà!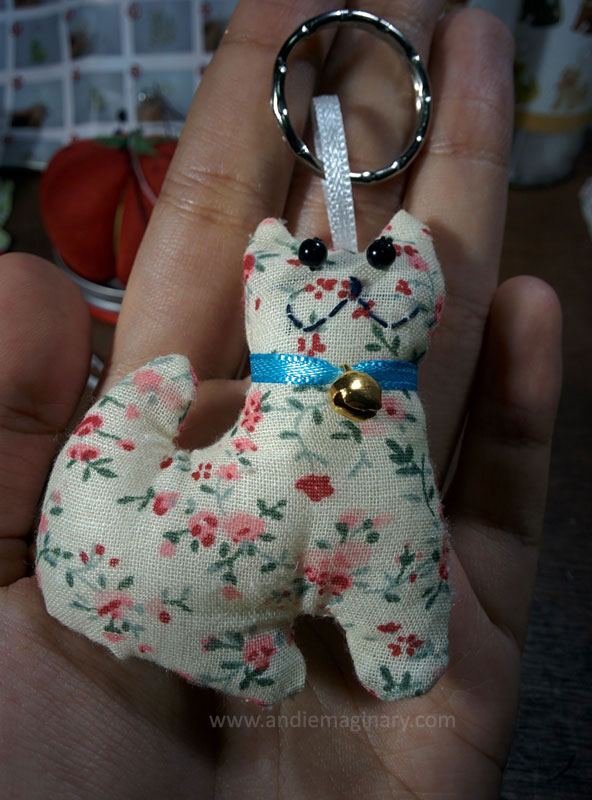
That is the finished keychain! I used to make stuff like this when I was in grade school. Pretty nifty craft kit idea. I’ll be making more of them in the future!

Hey I know this is off topic but I was wondering if you knew
of any widgets I could add to my blog that automatically tweet my newest twitter updates.
I’ve been looking for a plug-in like this for quite some time and was hoping maybe you would have some experience with something like this.
Please let me know if you run into anything. I truly enjoy reading your blog and I look forward
to your new updates.
Hi, thanks for stopping by. I haven’t really used any twitter plugins on websites before but have you looked through the plugins in wordpress.org?
Great post. I will be facing some of these issues as well..
Wow, superb blog layout! How long have you been blogging for?
you made blogging look easy. The overall look of your site is excellent, as well as the content!
Hi,
Thanks for stopping by my blog and the kind words. I have been messing around blogging for maybe 5 years. The layout is mostly just wordpress templates I changed small bits on.
How come Firefox displays a weird character when it should show a word?
Hi,
Thanks for stopping by my blog. I am not sure what weird character you see. Did you see it on my blog?